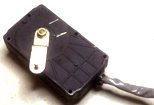
 About:
When canabalizing a car for do-it-yourself projects, this motor is probably the most overlooked in the whole car at the junkyard.
You can find it in most cars built after 1995 on the driver side center console up near the radio. It's the dashboard air mix servo motor.
It directs the air to the different ducts by moving flaps and valves when you select which vent you want the air to blow out of. And even if that vent selector dial
isn't electrical, like it's just cable/lever based, the car probably still has a button for 'out side air' or 'recirculate air'. As long
as the car has some electrical button for the climate controls than it will have this motor. There are quite a variety, but I've found
the best ones come from asian cars, specifically Honda's and Hundais.
They are great motors for DIY projects because they are geared for
a rediculous amount of torque, if you attach little tires to them, they are unstoppable with your bare hands. They range anywhere from
10 to 25 RPMs, so they're not hotrods, but because of their strength they are quite versitile. Also they are technically servos
because they will move to a specific position when the coresponding wire is grounded. The typical air mix servo has 5 positions, again
not an amazing about of resolution, but depending on what you need it for, it will rotate both clockwise or counter clockwise to
get to the new position regardless of the current position. Speaking of current, this motor draws around 80mA unloaded, and around
400mA at stall! Great for battery powered projects as most car motors are terribly power inefficient.
In this article I show what's inside one, how to modify it for continuous rotation for attaching tires, and how to use it's existing
guts to obtain rotational pulses for distance encoding.
 Picture Series:
Here is the initial dissassembly. Once the lever arm is removed, you can lift off the top cover by removing all the screws then
gently prying back all the snaps. You can see the main fly wheel has brushes which make contact to various copper lands which
provide feedback for the control circuitry to know where the lever arm is at all times.


|
To get to the motor, first remove the gear cover, this exposes the worm gear so the motor can be lifted out.
|


|
Solder new wires to the motor (cut the motor contacts off the circuit board and disregard). For encoding,
solder wires
to the solder pads pictures here. To reinsert the motor back into the houseing once the wires are soldered on might
require you to break a little bit of plastic from the houseing.
|


 About:
 Picture Series:


 Viewer Comments
 Leave A Comment